
How To: Halloween Nail Art // Sweet As Mae
October 25, 2015
Hey guys! Since it is almost Halloween and a lot of people like to join in on the scary festivities, I thought you guys might want to give this cute Halloween nail art a try! Warning: If you are going for actually scary nails, this nail art won't give you that look! It's cute scary.
Beware. The design features some cute paw prints leading to a little "scary" cat. I also managed to get 'Boo' in on one of my nails! This nail art isn't too difficult, but it can be a little fiddly. Plus with a few alterations this nail art can be used all year round. Let's give it a go!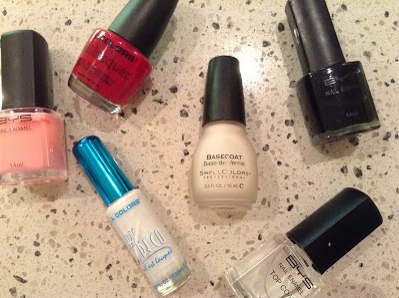

Step 1: Base Coat
This is super important, so although you might think it's a waste a time, don't rush your base coat. If your nails start to chip, it's actually the base polish chipping, so if your base coat is your nail colour, then that will chip straight away. Base coats help prevent chipping, basically. Like my last nail art design (Check that out here) I am using the Sinful Colours Base Coat. There are endless options of base coats, I just find that this one works well for me. Try and apply it in three strokes so the polish isn't heaped on your nails.

Step 2: Main Colour
I chose to paint my nails black since it's Halloween themed, but any dark colours will work for this design. This is one thing you can change to make this design work all year round. The colour I used was the BYS Black Satin. Don't worry if you go off your nails slightly, it's very easy to fix this (I'll tell you how later on) and black nail polish and other dark colours can be difficult to keep perfectly inside your nail line.


Step 3: Outline and fill your cat
Begin by outlining a generally shape of a cat head in the center of your thumb nail. You could use any nail but the thumb nail is the largest, so it's easier to paint the design on. I used a thin striper and just went straight up, painted one little triangle followed by another, then straight down the nail again. You don't have to use a striper but it is much easier. Once you've drawn your cat outline use nail polish of the same colour to fill it in. The striper I used is an L.A Colours striper, simply called White. I love these stripers because they have a massive range of colours to choose from! Make sure you wait for the cat shape to dry COMPLETELY before adding the next few details.


Step 4: Paw Prints and 'Boo'
You could do this before step 3, but it's fun to do this while you wait for your at shape to dry as I mentioned above. For the paw prints I used a dotting tool to paint one big dot then three smaller dots surrounding it. You don't have to have a dotting tool, anything from a bobby pin to a pen works just fine! I used the white striper as the colour of the paw prints by just putting a dollop onto a piece of paper then dipping my dotting tool in it. To write 'Boo' on my nails I used a striper to carefully write the letters (B, O, and O in case you forgot). This can be a bit tricky so you could skip this or put something else Halloween-themed on that nail. Don't stress if it's a bit messy, if the letters a bit wobbly you can just say it makes it look scarier ;)

 |
| Sorry for the change it lighting guys - it happens! Haha! |
Step 5: Cat details
Using a dotting tool I painted two little red eyes and a pink nose onto my cat. The red eyes really suited the white cat but you can make the eyes which ever colour you prefer. For the eyes I used L.A Colours polish in the shade Cranberry Red. I painted the little nose using the BYS Prima Ballerina polish, which is a beautiful pinky-peachy shade. For the whiskers I used a black L.A colours striper (called Black, would you believe it).

Step 6: Top Coat
This is the second to last step, and please don't get over excited and do this too quickly. Your cat will die if you do so. By die, I mean it will all smudge and go from looking "scary messy" to just yuck. If you lightly tap your nail and your finger gets slightly wet or leaves a faint imprint of your finger on your nail, don't apply a top coat yet! Once your nails are dry, apply your top coat carefully in thin strokes. Like the base coat, there are various types you can purchase, but this time I just went for my simple BYS Top Coat.

Step 7: Fixing your nails
The final step to adorable Halloween nails! If you make a few mistakes around your nail or go outside your nail line, it's pretty easy to fix. Just dip a cotton tip into some liquid nail polish remover and carefully rub it onto any spots of polish on your skin. It works like magic - literally!
I hope you guys enjoyed this post, make sure to comment below if you give this nail art a try or comment any other Halloween themed nail designs I could try! Also did you guys like the addition of the little video at the end? Pretty simple but I thought it was something a bit different for you :) I hope you have an amazing Halloween guys, and is it just me or are you guys pumped for Christmas . . . ?!
What's your favourite Halloween nail design or even your favourite costume?
♥
Stay Sweet,


0 comments